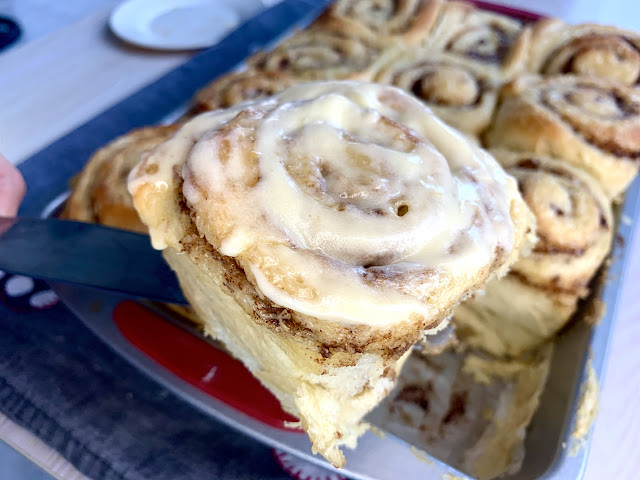
Homemade Cinnamon Rolls
Homemade Cinnamon Rolls
Cinnamon roll is one delectable treat. They say it’s best served at breakfast but I’d like to disagree. It’s great to eat it at any time of the day (that is if you are such a big fan of cinnamon).
And, of course, this is best served with coffee.
I remember making these the first time and my family absolutely loved it. The dough was soft and gooey and it had just the right amount of cinnamon and sugar.
I’ve wanted to share this recipe with you guys ever since I made this but we’ve decided to start selling these to our close friends for a little while and we had some really good feedback. My sister even insisted not to share this recipe because it is part of our business now. I wasn’t happy about that but throughout the experiences, I’ve made some few changes and I have finally been able to make these cinnamon rolls perfect!
The time has come that I finally get to share it with you all! But first, here are some few things you need to know to get you started.
The Dough
One thing you need to know about the dough is it should be elastic, soft, and a little bit tacky. It’s tacky but not too sticky to the touch. I always use a mixer when kneading this dough because it is much easier. You can absolutely knead this by hand but just make sure to apply some oil on your hands and on your work surface so the dough won’t stick.
To know when to stop kneading, try stretching the dough until it looks almost transparent. If the dough does not break or tear apart, that means you have developed enough gluten and your dough is ready to rise.

Activating the Yeast
To activate the yeast, make sure to use WARM MILK, about 110F or 43C. Your milk should not be too hot because the yeast will deactivate. This is usually done when using active dry yeast but I do it either way because this helps the dough become fluffy.
Make sure your eggs are at room temperature as well as the other ingredients because the yeast needs to be at a warm temperature for it to work its magic.

How to make the Cinnamon rolls super soft and gooey?
In my experience, letting the dough rise for too long resulted in having flat and dry cinnamon rolls. It was a disaster. My yeast was brand new and I did not expect my dough to rise so fast. So, if your dough has already doubled in size even if it has only been resting for less an hour, it’s time to move on to the next step.
Eggs and milk contribute to the softness of this dough. The original recipe I had included only one egg and it also included the use of water. I improved this recipe by eliminating the water and added an additional egg and replaced the water with milk. It made such a difference. You can experiment the recipes your way if you like.
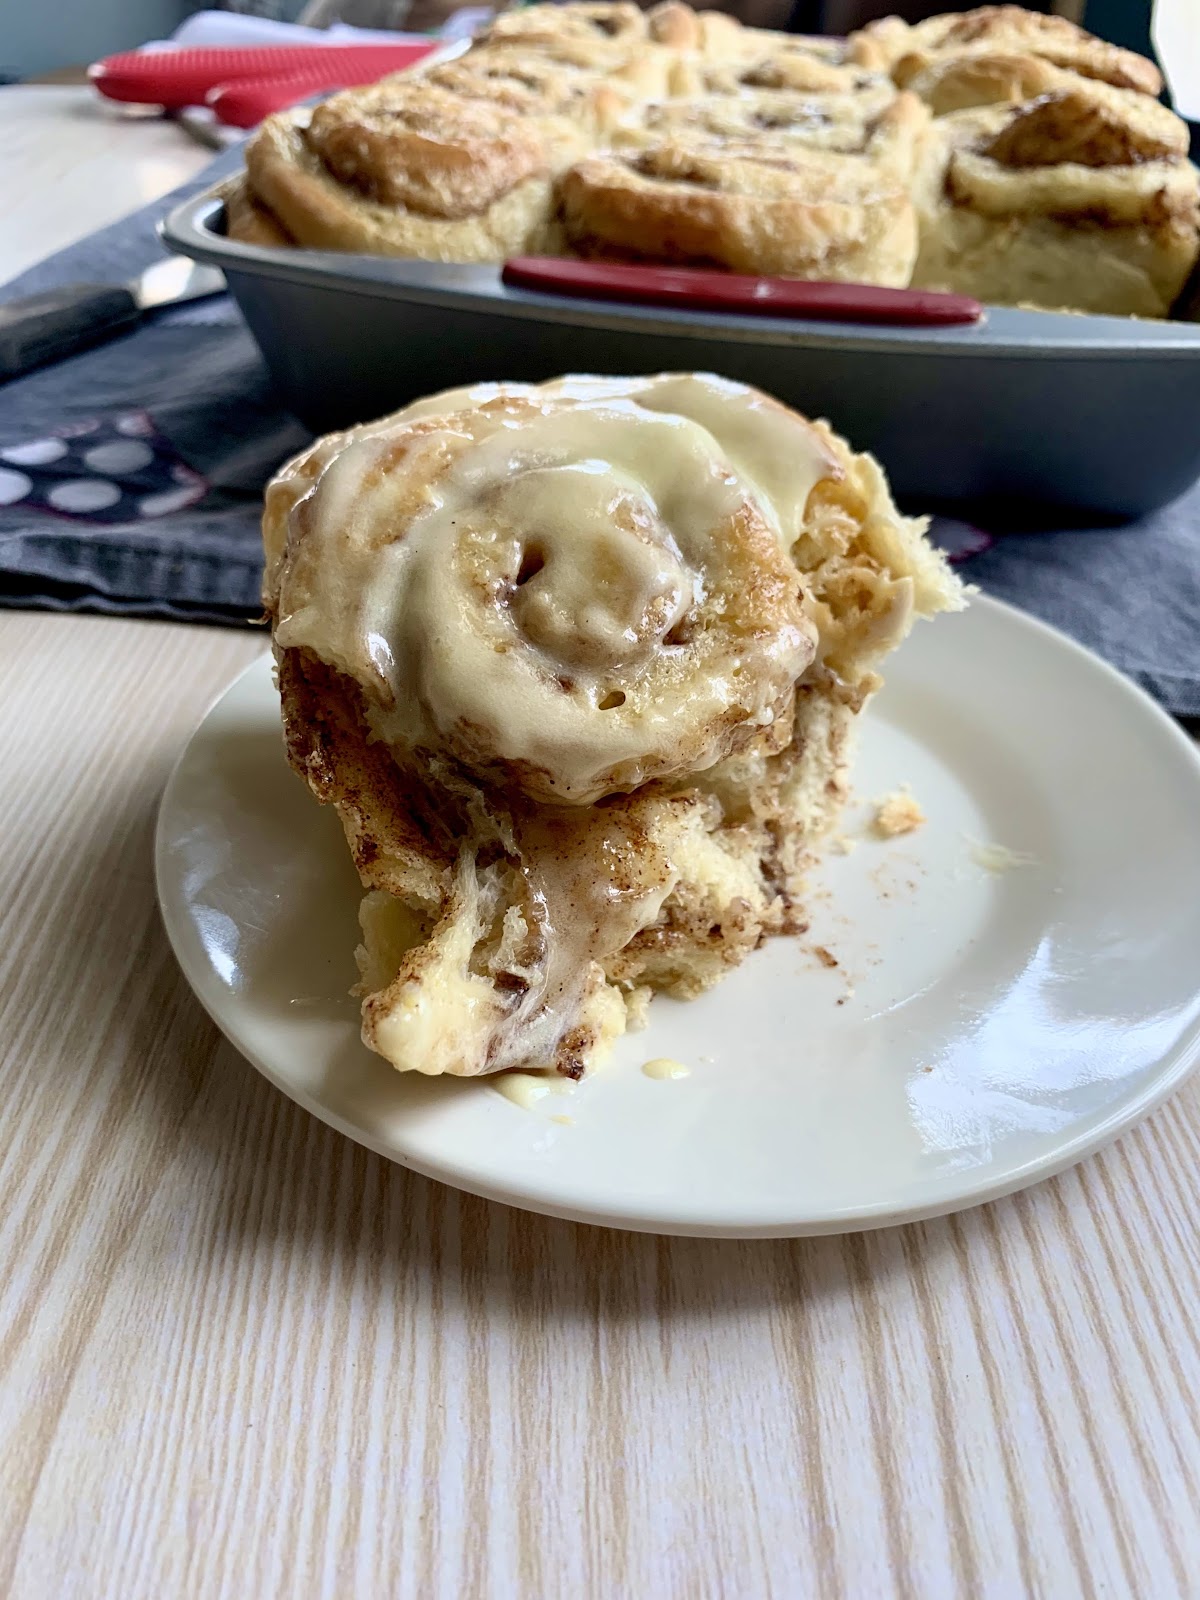
To make these soft but also gooey, the “not-so-secret” ingredient out there is actually using cream. It can be table cream, heavy cream, or all purpose cream. Just before baking the cinnamon rolls, pour the cream on top of the rolls. I use a brush to be able to coat them all with the cream. Make sure that the cream is warm but not too hot. Some like to bake the cinnamon rolls for 10 minutes first, then take them out of the oven and then pour the cream. I have tried this method but my cinnamon rolls deflated and I really like fluffy cinnamon rolls.
So these are the few things you need to know. These are really easy to make as long as you know what you are doing! Don’t worry, I’ll do my best to guide you throughout the way.

Cinnamon Rolls
Prep time: 30 minutes
Rise time: 1 hour first rise
45 minutes second rise
Cook time: 30 minutes
Total time: 2 hours and 45 minutes
Ingredients:
The Dough
All Purpose Flour - 4 cups (Spooned and leveled)
Salt - 1 tsp
Milk - 220ml (1 cup)
Sugar- 60g (¼ cup + 1 tbsp)
Instant/Active Dry Yeast - 11g/7g
Butter - 60g (4 tbsp)
Eggs - 2 pieces
Vanilla Extract - ¼ tsp
Cream (to be poured on top of rolls) - ½ cup
Cinnamon Filling
Brown Sugar - ¾ cup
White Sugar - ¼ cup
Ground Cinnamon - 1 ½ tbsp
Softened Salted Butter - ⅓ cup (75g) *if you don’t have salted butter, you can use unsalted butter and add just a pinch of salt to the mixture about ⅛ tsp
Cream Cheese Frosting
Cream Cheese - 4oz
Unsalted Butter - 60g (¼ cup)
Powdered Sugar - 120 g (1 cup)
Vanilla extract - 1 tsp
Directions
Prepare dry ingredients by sifting the flour first then add the salt and give it a quick mix. Make sure to measure the flour properly by spooning the flour into the measuring cups first and leveling it with a spatula.
Add the warm milk, sugar and yeast in a large mixing bowl or stand mixer. Let this sit for about 10 mins.
After letting the yeast activate, add the butter, eggs, and vanilla extract then mix.
Add the dry mixture by ⅓ at a time.
If the dough is too sticky, add only a tablespoon a time. But if it is touched with clean hands and it does not stick, stop adding flour. The dough needs to be super soft and elastic.
If kneading by hand: knead the dough for about 10 minutes letting it rest in between for about 3 minutes. Make sure to check if the dough is already elastic or it stretches without breaking.
If kneading using a stand mixer: on medium speed, beat the dough for about 5-7 minutes. Some of the dough will stick on the sides of the bowl since this dough is tacky. But, don’t worry! It is totally fine. Just use a rubber spatula to scrape the sides of the bowl.
After kneading, place the dough on an oiled bowl and cover with plastic wrap or just a clean kitchen towel. Place this on a warm place and let it rise for an hour or less. Let it rest just until the dough has doubled in size. While letting that rest, prepare the pan you will use by greasing it with oil then placing a parchment paper. Then, I like to brush the parchment paper with melted butter or margarine.
After letting it proof, punch the dough a few times or fold the dough a couple of times. Sprinkle your work surface with a generous amount of flour so that the dough won’t stick.
Place the dough on your work surface and roll it. Roll the dough into a 12x24 rectangle. Roll it as even as possible to get even shapes.
For the filling: in a bowl, combine the cinnamon, white sugar and brown sugar together and give it a quick mix. Then, add the very softened butter and mix until everything is well incorporated.
Spread the filling on the dough evenly. Make sure to mind the sides.
Roll the dough completely. Once it is rolled, try to reshape it if necessary to make it even. It doesn’t always have to be too perfect.
Using a floss, slice the roll into 12 or 16 equal pieces. Place the rolls on the prepared pan then cover with a clean kitchen towel and let this double in size again for about 45 minutes.
For the Frosting: In a bowl, combine the cream cheese and butter. Beat this with a hand mixer, or manually, until light and fluffy. Then, add the vanilla extract and sugar and mix on low speed until it is well incorporated. Set this aside until ready to use.
About 10 minutes before baking the cinnamon rolls, preheat your oven to 350F or 180C. Pour the warm cream on top of each roll. You can also use a brush to brush the cream on top if you like.
Bake the cinnamon rolls for about 28-30 minutes or until it is golden brown in color.
While still warm, frost the cinnamon rolls with the cream cheese frosting. Frosting them while warm will melt the cream cheese frosting a little bit and the cinnamon rolls will absorb some of its flavor.
Then, grab a coffee because these are ready to be served!

Comments
Post a Comment